

Markers & Drawing
Beyond uploading data, you build a map by hand with markers (points of interest) and drawn shapes (areas and lines). Both sync live to everyone in the room.
Add a marker
Section titled “Add a marker”-
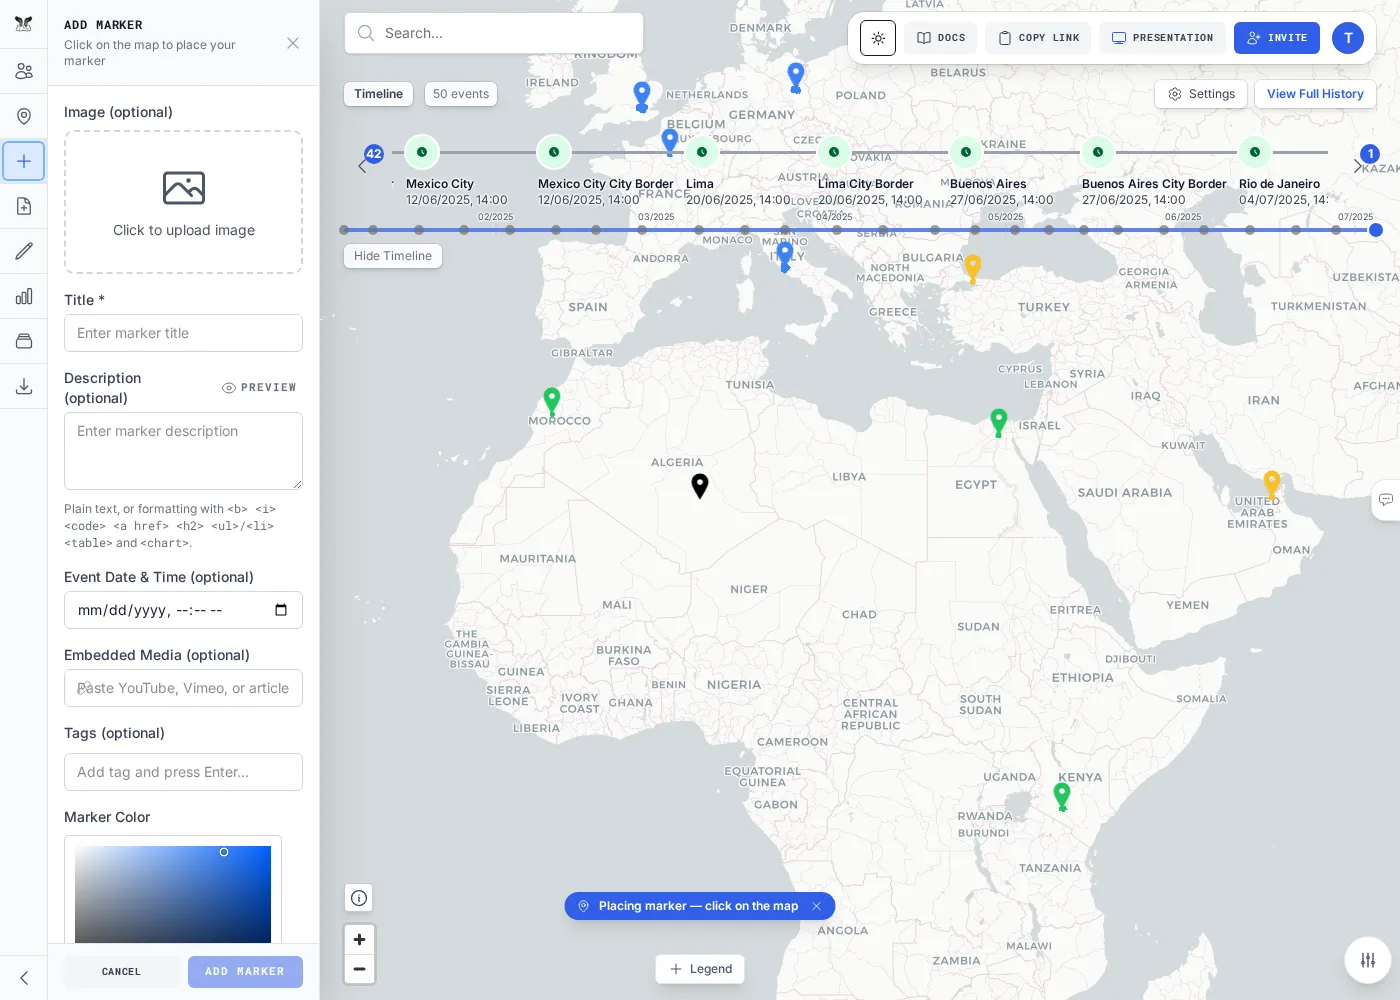
Click anywhere on the map. A pending pin drops and the Add Marker form opens. (You can also open the form first from the Add Marker tab in the left rail.)
-
Fill in the details — a title, an optional description, an icon, a color, and an optional date. Drag the pending pin to fine-tune its position before saving.
-
Save. The marker appears for everyone in the room and is added to the Markers list.
Markers can carry more than text: pick a built-in icon or upload a custom icon (SVG or PNG), and attach a photo. If a marker has a date, it also shows up on the timeline.
The description box also accepts a small set of HTML tags, so a marker can show formatted text, links, a table, or a line chart — see Rich Marker Descriptions.
Draw shapes
Section titled “Draw shapes”The Draw tab lets you sketch areas and lines directly on the map.
-
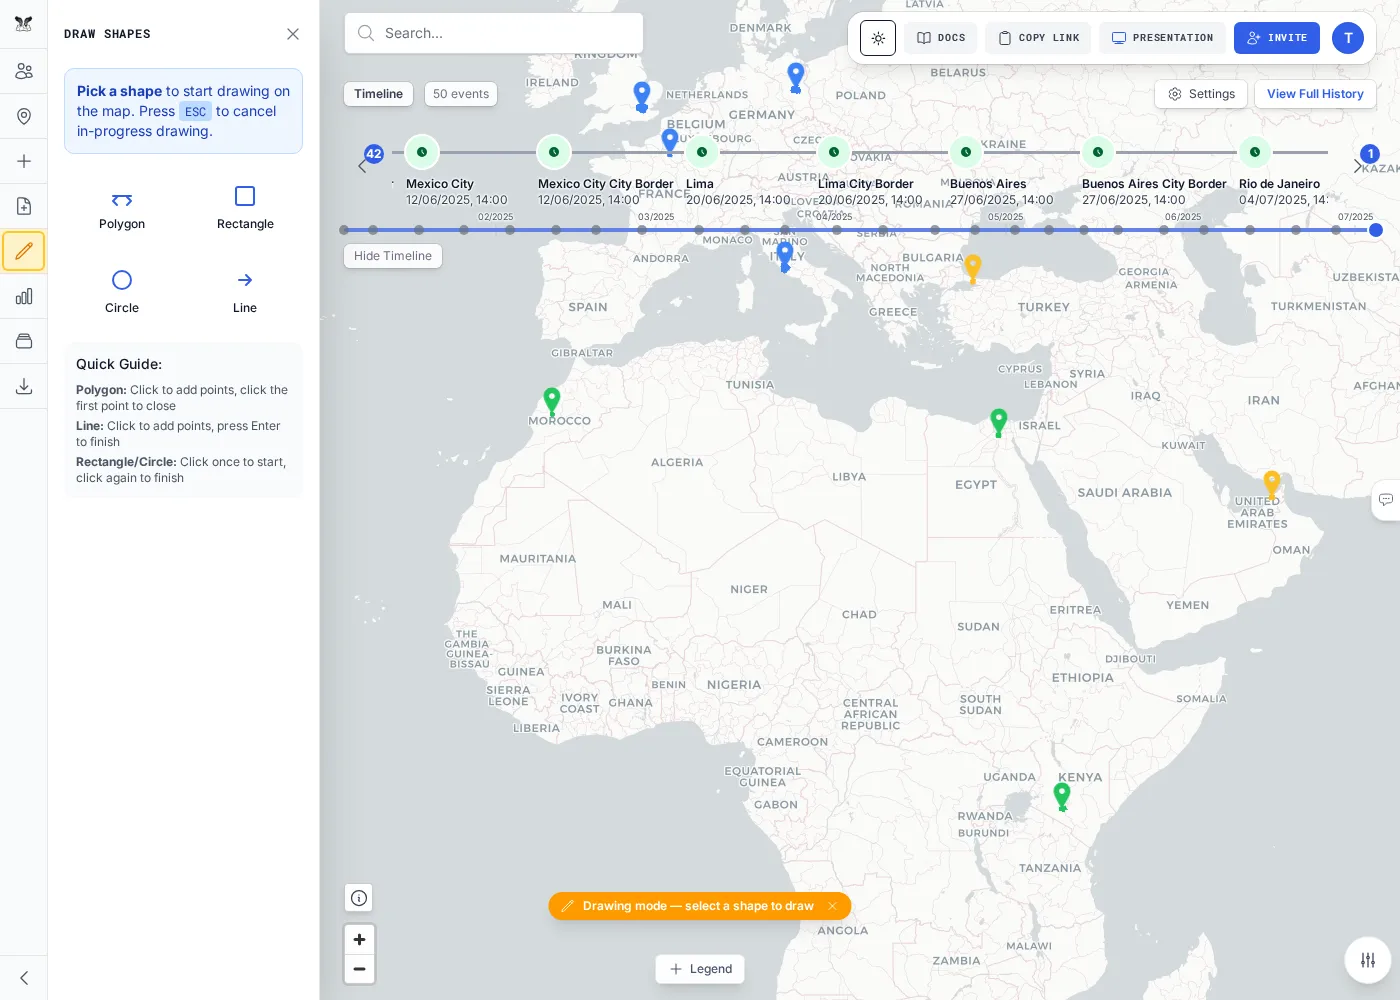
Open the Draw tab in the left rail and pick a shape: polygon, rectangle, circle, or polyline.
-
Draw on the map:
- Polygon / polyline — click each vertex; double-click (or click the first point) to finish.
- Rectangle / circle — press and drag.
- Press Esc at any time to cancel.
-
The shape becomes a layer you can style and rename, and — for polygons — run reports against. Select a shape later to edit its geometry.